
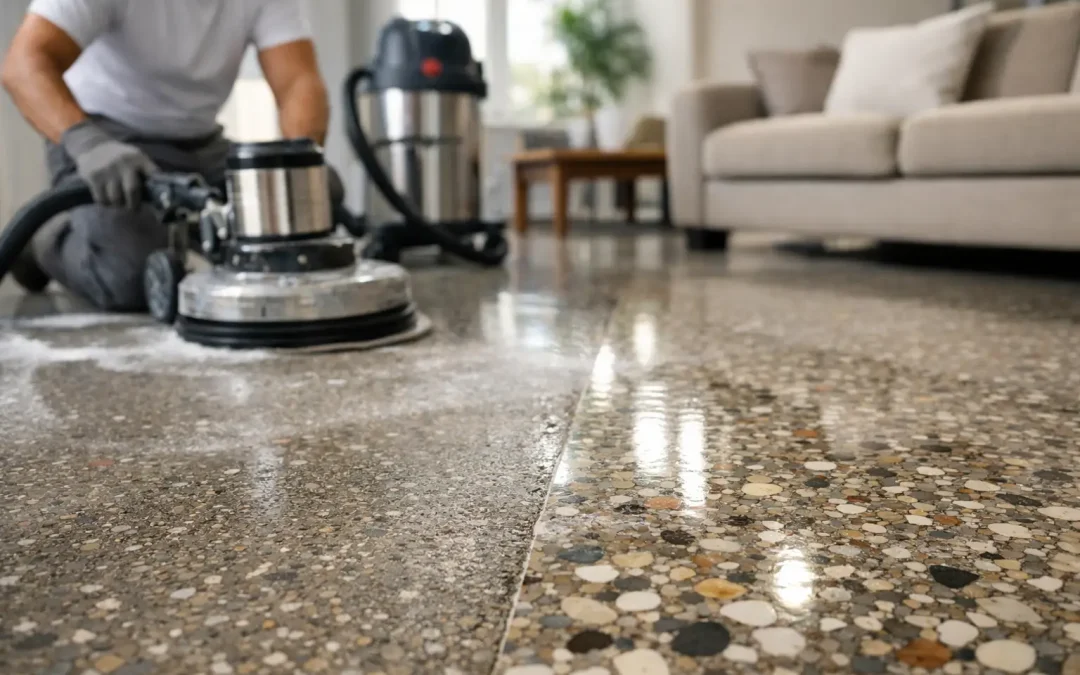
A terrazzo floor can look permanently worn long before it has reached the end of its useful life. Cloudy traffic lanes, dark stains, dull patches near entryways, and a finish that no longer reflects light are common concerns in older Florida homes. The residential terrazzo restoration process is designed to correct those problems at the surface level while preserving the durable floor underneath.
Terrazzo is not a coating that can simply be painted or covered with a quick shine product. It is a composite floor made from marble, quartz, granite, glass, or similar chips set in a cement- or resin-based binder. That construction gives it exceptional longevity, but it also means the correct restoration method depends on the floor’s condition, its binder type, past coatings, repairs, and the homeowner’s expectations for sheen and color.
What Restoration Can Correct
Professional restoration can often improve dullness, embedded soil, minor scratches, light etching, old wax buildup, and discoloration caused by years of foot traffic. It can also make the floor easier to clean and help protect it from future staining. For many homeowners, that is a better investment than covering an original terrazzo floor with vinyl, tile, or carpet.
There are limits. Deep cracks, loose sections, major moisture issues, or severe staining may require repairs before polishing begins. Some old stains have penetrated beyond the workable surface and may lighten substantially without disappearing completely. A responsible assessment should set those expectations before work starts, not after the floor has been refinished.
The Residential Terrazzo Restoration Process, Step by Step
The best results come from a methodical process rather than a single cleaning or polishing product. Each stage prepares the surface for the next one.
1. Inspecting the Floor and Identifying Its Condition
Restoration begins with an inspection. The technician looks for cracks, chips, hollow spots, exposed aggregate, uneven areas, previous patches, wax or topical sealer buildup, and signs that moisture may be affecting the floor. The floor is also checked for areas where rugs, furniture, or sunlight have created uneven color.
This step matters because not every dull terrazzo floor needs aggressive grinding. If the issue is mostly residue from old coatings, a less invasive approach may be appropriate. If scratches and wear are widespread, honing may be needed to create an even, clean surface before polishing.
Homeowners should also point out known stains, prior repairs, and areas that concern them most. A good estimate reflects the actual condition of the floor, not just the square footage.
2. Removing Furniture, Debris, and Old Surface Buildup
The work area is cleared and thoroughly cleaned to remove loose grit, dust, and contaminants that could interfere with restoration. If wax, acrylic finish, or another topical coating has been applied over the years, it must be stripped carefully.
Old coatings often cause the most confusing terrazzo problems. A floor may look yellow, blotchy, or dull because the coating has aged, not because the terrazzo itself is ruined. Removing that buildup can reveal the true condition of the material. It can also expose scratches, patches, and stains that had been hidden under the finish.
3. Repairing Chips, Cracks, and Small Defects
Before honing or polishing, damaged areas are addressed with a repair material selected to blend as closely as possible with the existing terrazzo. Matching aggregate size, base color, and pattern takes skill. A repair can improve stability and appearance, but it should not be promised as invisible, especially on a highly varied vintage floor.
Hairline cracks may be cosmetic, while wider cracks can point to movement in the slab below. If movement is active, a repair may not hold permanently. Identifying that distinction protects the homeowner from unrealistic expectations and helps determine whether additional evaluation is needed.
4. Honing the Terrazzo to Remove Wear
Honing uses professional diamond abrasives and specialized equipment to refine the terrazzo surface. The goal is to remove a controlled amount of material – enough to reduce scratches, flatten worn areas, remove etching, and create a consistent foundation for polishing.
The amount of honing depends on the floor. A lightly worn terrazzo floor may need only minimal refinement. A floor with deep scratches, uneven sheen, or extensive damage may require several stages with progressively finer abrasives. More aggressive restoration can produce a stronger visual reset, but it also takes more time and should only be used when the condition calls for it.
This is why a mop-and-shine approach rarely delivers lasting results on neglected terrazzo. A temporary finish may make the floor look better for a short time, but it does not remove the damage causing the dull appearance.
5. Polishing for the Right Level of Shine
Once the terrazzo is honed evenly, polishing brings clarity and reflectivity back to the surface. The desired finish is not always a mirror-like gloss. Some homeowners prefer a softer satin appearance that feels more natural and can make everyday dust less noticeable. Others want the bright, polished look that showcases the floor’s aggregate and color variation.
The right sheen depends on the home, the lighting, and practical maintenance preferences. A high-polish finish can be beautiful in a living room, foyer, or mid-century home with original terrazzo. In busy kitchens or homes with pets, a lower sheen may be the more comfortable choice.
6. Sealing and Protecting the Restored Surface
After the floor has been restored and allowed to dry properly, a quality penetrating sealer may be applied where appropriate. Sealer helps reduce the absorption of spills and makes routine cleaning easier. It is protection, not an invisible force field. Acidic liquids, oils, dyes, and standing water should still be cleaned promptly.
The sealer choice should match the terrazzo and the homeowner’s maintenance goals. Penetrating products protect within the surface without creating a thick film, while topical products can alter appearance and require more frequent maintenance. The best option depends on the material, the desired finish, and whether a previous coating system is being removed or maintained.
What Homeowners Should Expect During the Work
Terrazzo restoration is detailed work, and the timeline varies with the floor’s size and condition. A relatively open room with light wear is very different from a whole-home project with furniture, multiple repairs, old coatings, and heavy staining. Access, ventilation, transitions to other flooring, and the amount of prep work all affect the schedule.
Modern restoration equipment can control much of the dust and slurry, but this is still an active refinishing project. Homeowners should plan for noise, limited access to work areas, and a short period of care while the floor is completed and protected. Clear communication before the job begins makes the process far easier to manage.
Natural Surface Restoration evaluates terrazzo with the same practical goal homeowners have: bring back the character of the existing floor, protect it for the future, and avoid unnecessary replacement whenever restoration is the better option.
Caring for Terrazzo After Restoration
The floor’s appearance after restoration depends partly on how it is maintained. Dust and grit act like fine abrasives, so regular dry mopping or vacuuming with a hard-floor setting helps prevent new wear. Use a neutral cleaner made for stone or terrazzo, not vinegar, citrus-based cleaners, bleach, or harsh degreasers that can damage the finish or leave residue.
Place walk-off mats at exterior doors, but avoid rubber-backed mats that can trap moisture or discolor some surfaces. Wipe spills promptly, especially wine, cooking oil, coffee, and acidic drinks. Felt pads under furniture legs will also help prevent scratches when chairs or tables are moved.
When a terrazzo floor starts to lose its even sheen again, address it early. Light professional maintenance is usually simpler and more cost-effective than waiting until traffic paths become deeply worn. Request an estimate when you first notice dullness, staining, or surface damage, and you will have a clearer path to preserving one of your home’s most durable original finishes.